Broken rod and rehab ...
Posted: Sun Jun 30, 2019 1:58 pm
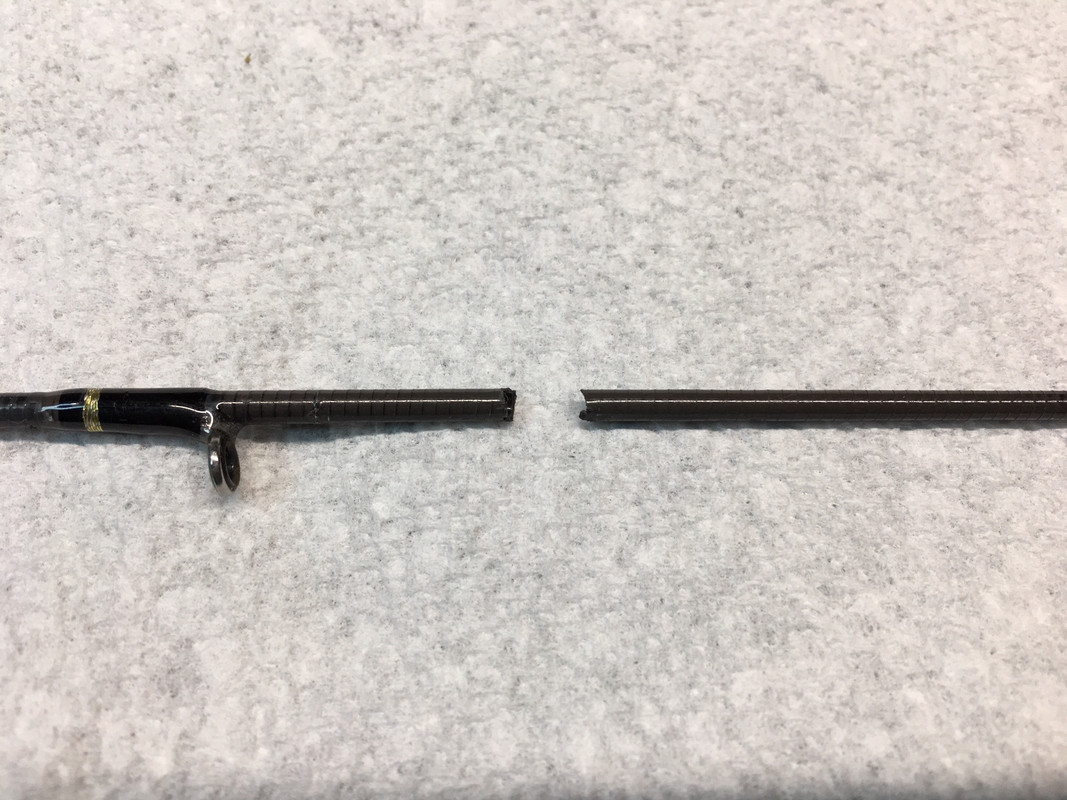
Went on our annual camping trip at the end of May, when we arrived and unpacked I discovered my Kuying Teton had broken approximately 12" from the tip. This is the two piece TTC662L light power casting rod I have my Tsurinoya XF 50 BFS reel mounted to.The tip section is hollow on these. To say I was bummed out is putting it mildly. I have read several accounts of broken tips on these, but honestly it may have been my fault as a result of how I had it placed in my kayak for the trip to the campground. Anyhow, I lost use of that rig for the trip. When I returned home I looked into getting a replacement tip section, which are available through at least 2 sources. Both are overseas and with shipping costs are close to half the value of a new rod. I'd been mulling my options as I've really come to like this rig in the short time I've owned it, the rod especially has performed well for me. Then I recalled a post I'd seen on here some years back where a broken rod was repaired in much the same fashion that I'm outlining here (It may have been Mattman from Otterods), so regardless of who originated it, thanks for the inspiration.
The break was relatively clean, which was to my advantage as I wouldn't lose any length. Had it been crushed and flattened I would have had to make some severe cuts.
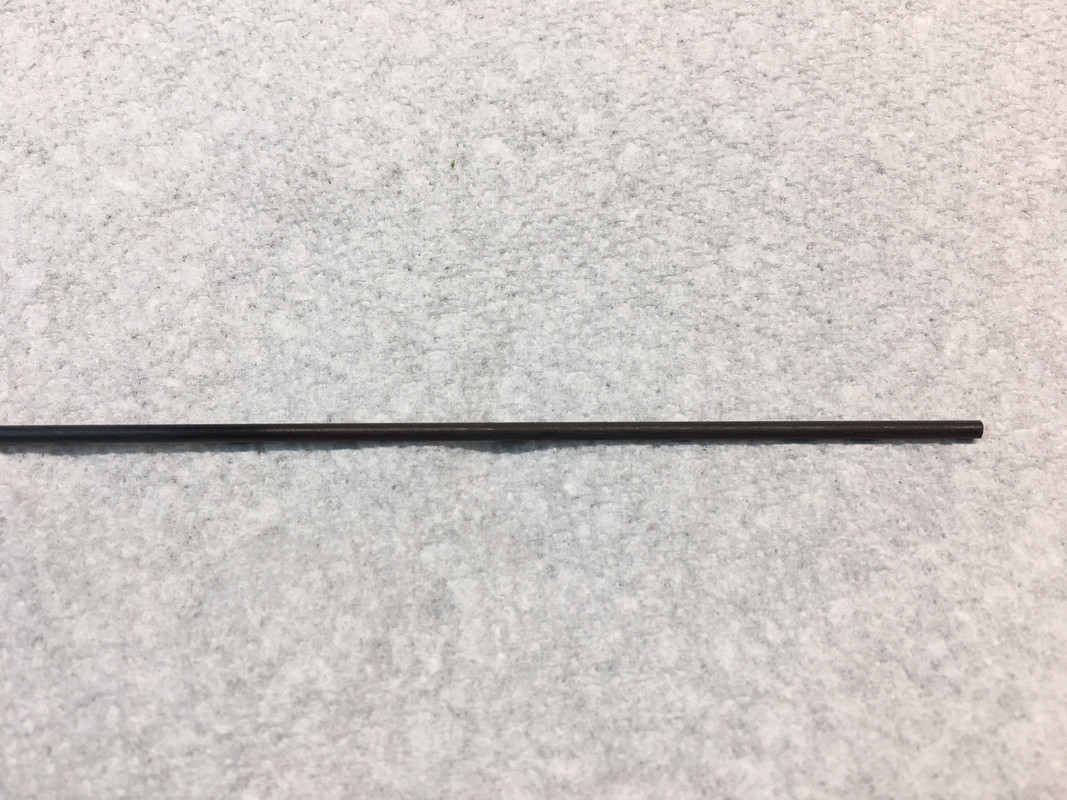
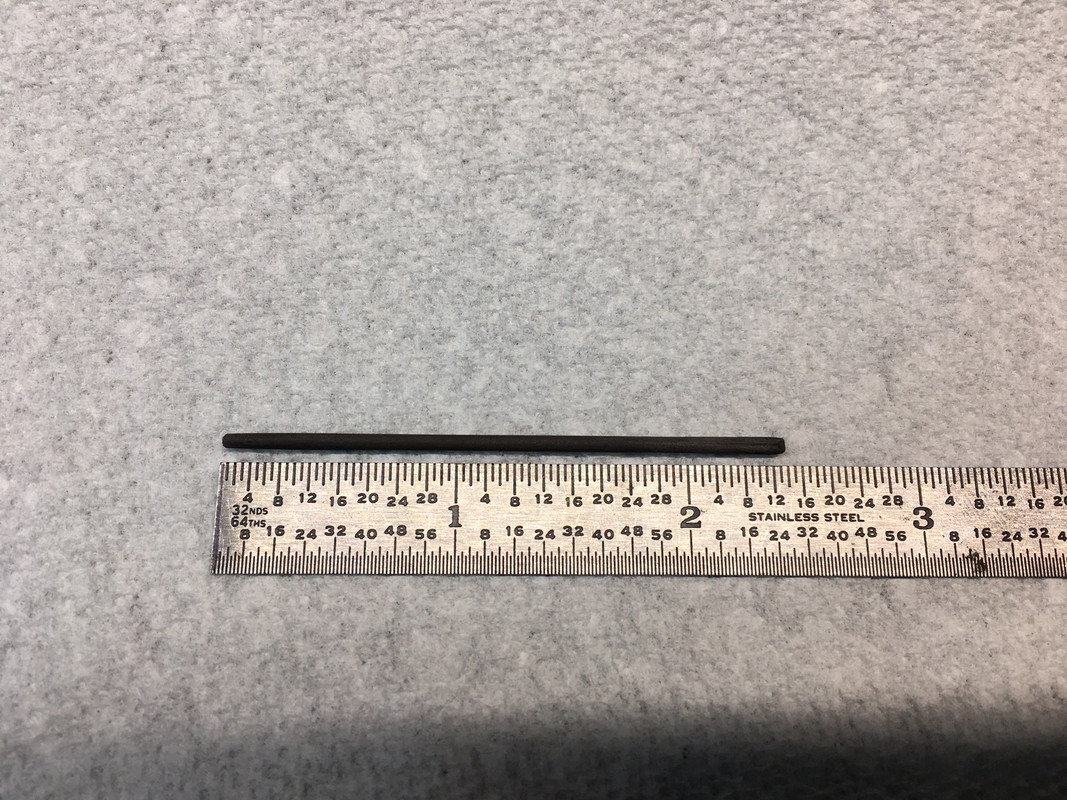
Using digital calipers I measured the I.D. of the rod, which was 1.75 mm, that's pretty small. My next dilemma was what to use for a repair medium ? I had found round fiberglass rods online, but wasn't too keen on using them. I then stumbled on 2 mm diameter carbon fiber rods on Amazon. I got a 3 pack of 500 mm (just under 20") rods for under $3.00. After shipping I was still well under $10.00 The carbon fiber weighs virtually nothing but is flexible and strong.
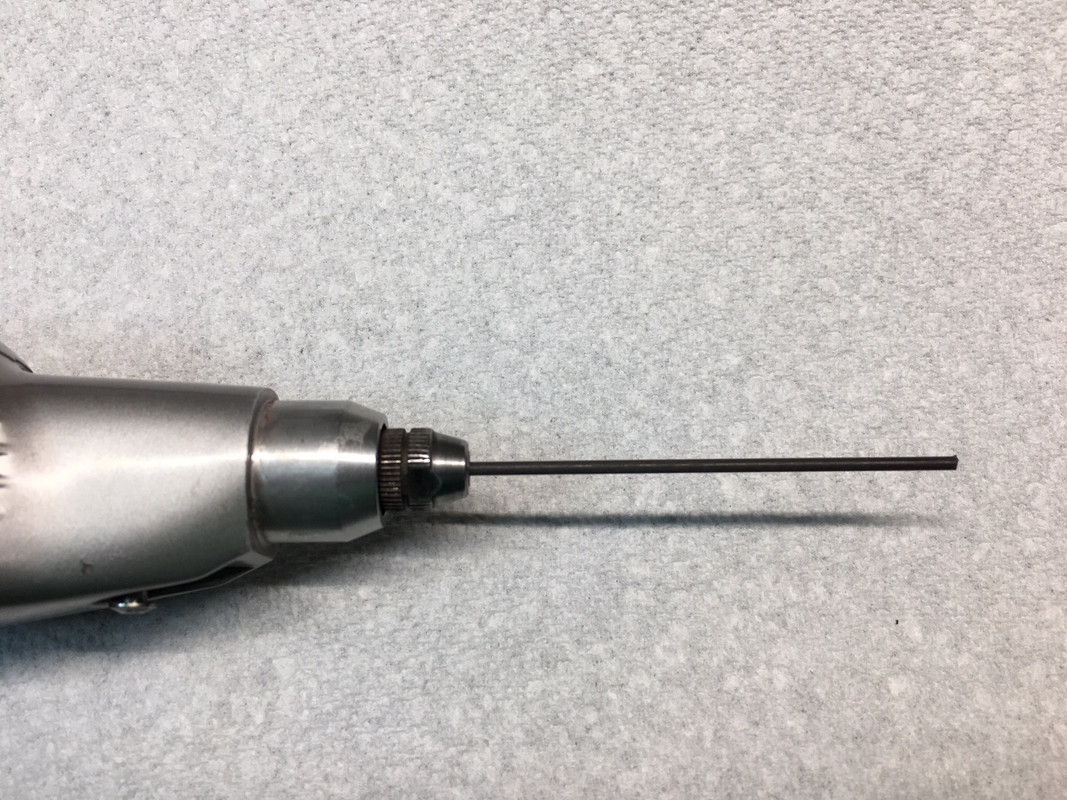
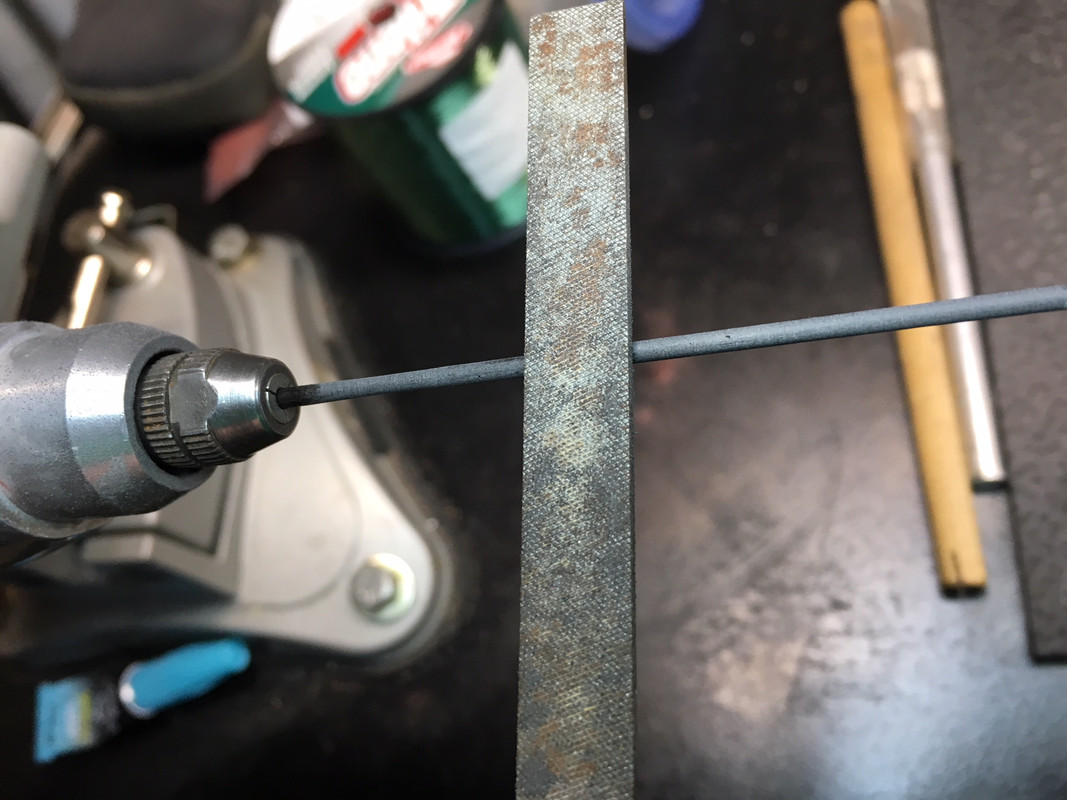
The next step was to make a repair section out of the carbon fiber rod. I cut a 3" section of rod from one of the 3 lengths I got and mounted it into my rotary tool, which I then secured in a vise. I had effectively made a lathe. I then turned on the rotary tool and used a fine hobby file to remove rod material in order to reduce it from it's original 2 mm O.D. down to approximately the 1.75 mm I.D. of the broken rod. I also had to factor in the ever so slight taper of the rod blank. I accomplished that by applying more pressure on the free end of the rod with the file and using less pressure as I worked the file towards the tool. It took me about 4 attempts to dial in the correct tool speed and file pressure until I had a repair section I was satisfied with. I settled on a 2.5" repair section which would be 1.25" of support on either side of the break.
When I was satisfied with the dry fit I marked the halfway point of the repair section with tape so I knew when to stop inserting it. I then used super glue to secure the repair section into one half of the broken rod section.
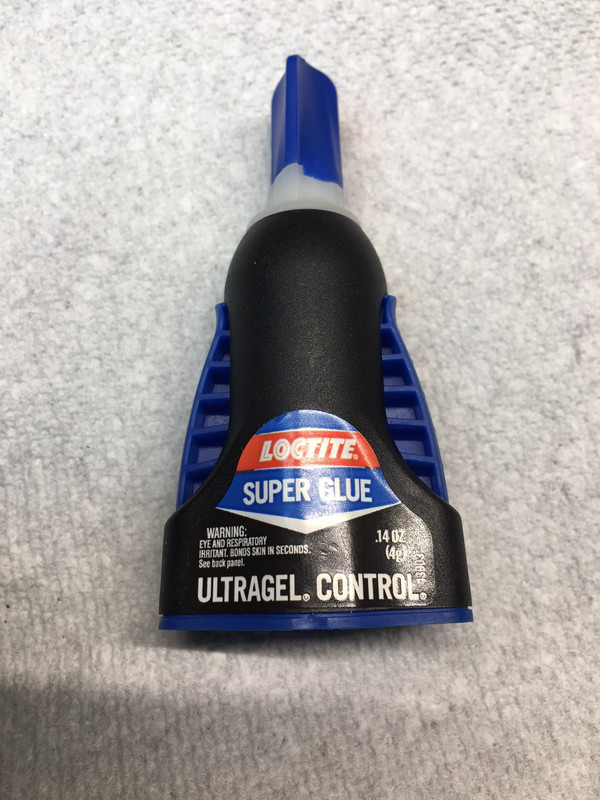
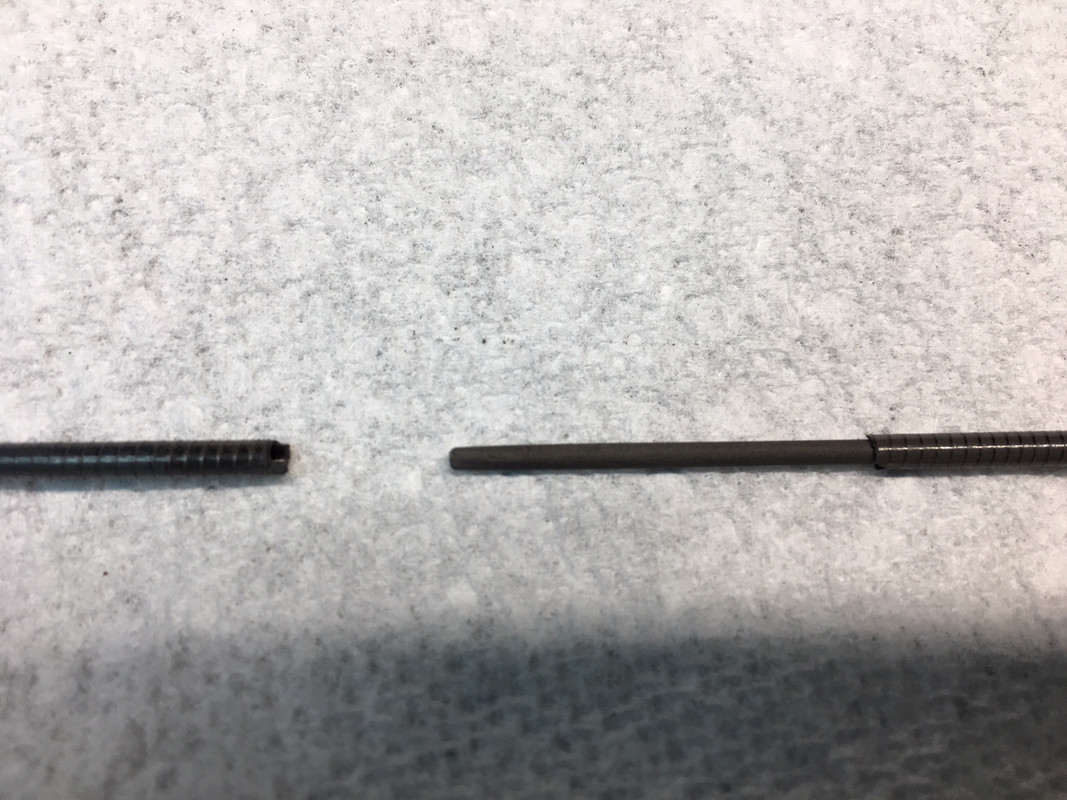
After a final dry fit, it was time to complete the repair. I had to work quickly to align the guides as the the super glue sets very fast. If you go back to the very first picture and look closely you'll notice the break was not perfectly symmetrical which was a good thing as it left me irregular surfaces much like two puzzle pieces to aid me in getting the sections properly aligned. After joining the two sections back together and cleaning the excess glue that had oozed from the repair area, I applied a thin coat of clear Devcon 2 Ton epoxy.
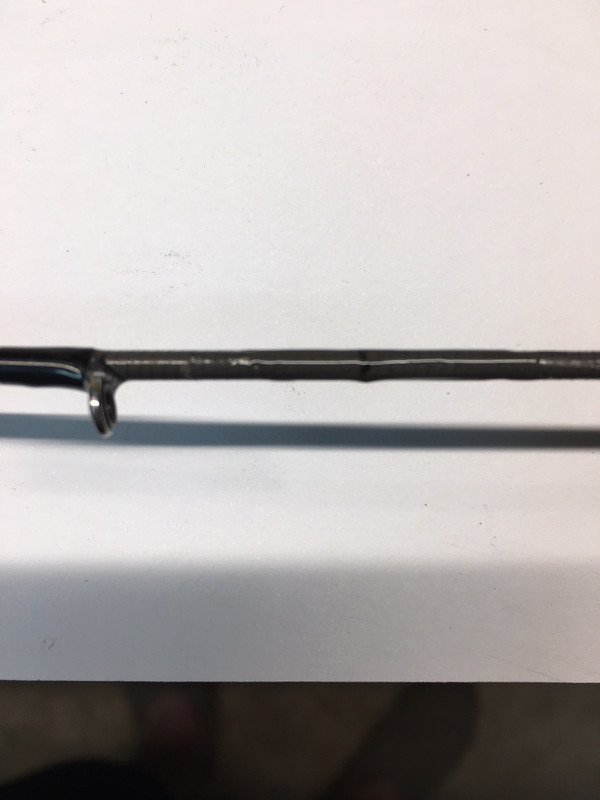
I completed the repair today. The rod section flexes nicely and I'm happy with the way it turned out. Of course I need to actually fish it to see if I was truly successful, but it looks promising so far. I will definitely follow up with an update good or bad. Wish me luck
The break was relatively clean, which was to my advantage as I wouldn't lose any length. Had it been crushed and flattened I would have had to make some severe cuts.
Using digital calipers I measured the I.D. of the rod, which was 1.75 mm, that's pretty small. My next dilemma was what to use for a repair medium ? I had found round fiberglass rods online, but wasn't too keen on using them. I then stumbled on 2 mm diameter carbon fiber rods on Amazon. I got a 3 pack of 500 mm (just under 20") rods for under $3.00. After shipping I was still well under $10.00 The carbon fiber weighs virtually nothing but is flexible and strong.
The next step was to make a repair section out of the carbon fiber rod. I cut a 3" section of rod from one of the 3 lengths I got and mounted it into my rotary tool, which I then secured in a vise. I had effectively made a lathe. I then turned on the rotary tool and used a fine hobby file to remove rod material in order to reduce it from it's original 2 mm O.D. down to approximately the 1.75 mm I.D. of the broken rod. I also had to factor in the ever so slight taper of the rod blank. I accomplished that by applying more pressure on the free end of the rod with the file and using less pressure as I worked the file towards the tool. It took me about 4 attempts to dial in the correct tool speed and file pressure until I had a repair section I was satisfied with. I settled on a 2.5" repair section which would be 1.25" of support on either side of the break.
When I was satisfied with the dry fit I marked the halfway point of the repair section with tape so I knew when to stop inserting it. I then used super glue to secure the repair section into one half of the broken rod section.
After a final dry fit, it was time to complete the repair. I had to work quickly to align the guides as the the super glue sets very fast. If you go back to the very first picture and look closely you'll notice the break was not perfectly symmetrical which was a good thing as it left me irregular surfaces much like two puzzle pieces to aid me in getting the sections properly aligned. After joining the two sections back together and cleaning the excess glue that had oozed from the repair area, I applied a thin coat of clear Devcon 2 Ton epoxy.
I completed the repair today. The rod section flexes nicely and I'm happy with the way it turned out. Of course I need to actually fish it to see if I was truly successful, but it looks promising so far. I will definitely follow up with an update good or bad. Wish me luck